Plotter එකක් හදමු - Basic


කීපදෙනෙක්ම Arduino වලින් Plotter එකක් හදන්නේ කොහෙමද කියලා අහල තිබුණා. ඒ නිසා මම මේ ලිපියෙන් Plotter එකක් නිර්මාණය කරන්නේ කොහොමද කියලා කෙටියෙන් පැහැදිලි කරලා දෙන්නම්.


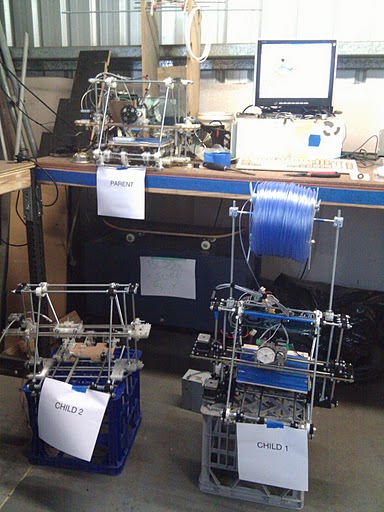
Plotter එකක වැදගත්ම සහ අමාරුම කොටස තමයි, Hardware කොටස. ඒ කියන්නේ භෞතිකව Plotter එක නිර්මාණය කරගැනීම. අපි Plotter එකේ hardware (දෘඩාංග) නිර්මාණය කරන ආකාරය අනුව තමයි Plotter එකේ ගුණාත්මක බව රදාපවතින්නේ.


Youtubeinstructables.com site එකේ search කලොත් Plotter එකකට සුදුසු Plans ගොඩක් හොයාගන්න පුළුවන්. ඒ වගේ සැලසුම් කිපයක් එකතු කරගත්තම, Plotter එක හදන්න ඕන විදිහ ඔයාලටම තීරණය කරගන්න පුළුවන් වෙයි. ආධුනිකයෙක් නම් මුලින්ම CD Rom පාව්ච්චි කරලා පොඩි Plotter එකක් හදන්න බලන්න. ඒක ගොඩක් ලේසියෙන් හදන්න පුළුවන් වගේම වියදමත් අඩුයි. (ඉලෙක්ට්‍රොනික් බඩු හදන තැනකින් ඉල්ලුවොත් සමහර වෙලාවට පරණ CD Roms නිකන් වුණත් දෙනවා.)

eBooks


instructables.com වලින් මම Download කරගත්ත projects කීපයක්


Plotter සදහා පාවිච්චි කරන්නේ Stepper motors. ඒ නිසා මේ Stepper motors පාලනය කරන්න විශේෂ පරිපථයක් අවශ්‍ය වෙනවා. 


Stepper Motor Drivers: 


DRV8825


Easy Drive V4.4

Plotter එක වැඩකරවන්න Code එකක් ලියන්න ඕන. හැබැයි ඇත්තටම කියුවොත් අපි කිසිම Code එකක් ලියන්න මහන්සි වෙන්න ඕන නෑ. මොකද GRBL කියලා Library එකක් තියෙනවා. ඒක Arduino board එකට Upload කරන්න විතරයි තියෙන්නේ.


මේ ලින්ක් එකෙන් Arduino GRBL library එක download කරගන්න.


GRBL ගැන වැඩි විස්තර දැනගන්න

මේ තියෙන්නේ Arduino එකට EasyDrives සම්බන්ධ කරන ආකාරය Diagram එක. මෙතනින් අත්‍යවශ්‍ය වෙන්නේ x,y,z අක්ෂ 3ම Stepper motors වලට සම්බන්ධ EasyDriver board වල Step හා Direction කියන pins සම්බන්ධ කරගැනීමයි.


Limit x,y,z කියන ඒවා සම්බන්ධ කරන්න‍ේ Mechanical end stops කියන ස්ව්ච් වර්ගයටයි. මේවාගෙන් කෙරෙන්නේ plotter එකේ පෑන/spindle එක කෙලවරකට ආවාම auto stop කරන එක. මේ ස්විච අනිවාර්යයෙන්ම තිබියයුතු නෑ. ඒත් තියෙනවා නම් හොදයි.


ඉතිරි pins නම් Plotter එකට අවශ්‍ය වෙන්නේ නෑ.

දැන් Plotter එක නිවැරදිව සකස් කරගත්තට පස්සේ ඊළග පියවර තමයි පරිගණකයට සම්බන්ධ කරලා පරිගණකය මගින් Plotter එක පාලනය කිරීම. ඒකට පාවිච්චි කරන්න පුළුවන් Software ගොඩක් තියෙනවා. ඒ අතරින් මම පාවිච්චි කරන්නේ Universal Gcode Sender කියන Software එක. 


දැන් මේ Software එක පාවිච්චි කරලා Plotter එක ක්‍රියාත්මක කරන්න කලින්, GRBL වල Settings කීපයක් හදාගන්න ඕන. motor directions, speed, acceleration වගේ දේවල්.


දැන් Plotter එකේ වැඩ ඉවරයි. Plotter එකට අදින්න ඕන චිත්‍ර ලබාදෙන්න ඕන Gcode කියන ආකාරයටයි. මේකට වැඩිපුරම පාවිච්චි කරන්නේ Inkscape මෘදුකාංගයයි. මෘදුකාංගයට අමතරව gcodetool කියලා plugin එකකුත් යොදාගන්න වෙනවා.


මේ ලිපියේ අරමුණ වුනේ Plotter එකක් නිර්මාණය කරන්න අවශ්‍ය මූලික මගපෙන්වීම ලබාදීමයි. ඉදිරියේදී මීට වඩා විස්තරාත්මක ලිපි පෙලක් ඉදිරිපත් කරන්නම්. 

දිගටම බ්ලොග් එකත් එක්ක රැදිලා ඉන්න. ස්තූතියි.

3D Printer එකක් හදමු


ගොඩක් අය මගෙන් අහලා තිබුණා 3D Printer එකක් හදන්නේ කොහොමද කියලා. මාත් තවම 3D Printer එක හදලා ඉවර නැති නිසා මාත් මේ ක්ෂේත්‍රයට ආධුනිකයෙක්. ඒ නිසා මට දැනට කරන්න පුළුවන්, මම 3D Printer එක හදන්න පාවිච්චි කරපු මූලාශ්‍ර ඔයාලත් එක්ක Share කරගැනීම විතරයි.

මම හදන 
3D Printer එක RepRap කියන Platform එකට තමයි අයිති වෙන්නේ. RapRap කියන්නේත් Arduino වගේ platform එකක්.


RepRap is humanity's first general-purpose self-replicating manufacturing machine.
RepRap takes the form of a free desktop 3D printer capable of printing plastic objects. Since many parts of RepRap are made from plastic and RepRap prints those parts, RepRap self-replicates by making a kit of itself - a kit that anyone can assemble given time and materials. It also means that - if you've got a RepRap - you can print lots of useful stuff, and you can print another RepRap for a friend...
වැඩි විස්තර : http://reprap.org/

RepRap වලත් Arduino වගේම එක එක 3D Printer models තියෙනවා. (Click to view) මම තෝරාගත්තේ RepRap Prusa i3 Rework කියන ආකෘතියයි. මේක තමයි ආධුනිකයෙකුට පහසුවෙන්ම හදන්න පුළුවන් ආකෘතිය. මේ Printer එකෙන් 20x20x20 cm ප්‍රමාණයක 3D Printing කරන්න පුළුවන්. මේකේ Mother board එක විදිහට පාවිච්චි වෙන්නේ Arduino Mega 2560 board එක. Ramps 1.4 කියලා Shield එකකුත් පාවිච්චි වෙනවා.

අවශ්‍ය කොටස් වලින් වැඩි ප්‍රමාණයක් eBay එක හරහා තමයි ගෙන්වන්න වෙන්නේ. සමහර කොටස් (rods, nuts, screws, ...) මෙහෙන් ගන්නත් පුළුවන්.

කැමතිනම් Frame එකත් Order කරන්න පුළුවන්. මම නම් ලී, ඇලුමිනියම් වලින් Frame එක හදාගත්තා.


අවශ්‍ය උපාංග ලැයිස්තුව : Bill of materials
නිල වෙබ් අඩවිය : RepRap Wiki

එකලස් කිරීම : 
PDF  WEB

Quadcopters 13 : Transmitter එක හදුනාගනිමු


මම කලින් ලිපියක Transmitter එක ගැන කෙටි හැදින්වීමක් කළා. මේ ලිපියෙන් ඉදිරිපත් කරන්න බලාපොරොත්තු වෙන්නේ Transmitter එකක hardware පැත්තයි, program කරන ආකාරයයි.


Transmitter වර්ග ගොඩක් තියෙන නිසා ඒ හැම එකක් ගැනම වෙන වෙනම කථා කරන්න අමාරුයි. එ් නිසා මම හැම Transmitter එකකටම පොදු ගුණාංග ගැන විතරයි කථා කරන්නේ. ඕනෑම Transmitter එකක් ගැන වැඩි විස්තර, අදාළ Transmitter එකේ User manual එක මගින් දැනගන්න පුළුවන්.

මම ඉදිරියට, Transmitter කියන වචනය, කෙටියෙන් TR කියලා හදුන්වන්නම්.


කලින් ලිපියක සදහන් කළා වගේම TR එකක වටිනාකම තීරණය වෙන්නේ එමගින් පාලනය කරන්න පුළුවන් Channels ගණන මතයි. හැම TR එකකම වගේ අනිවාර්යයයෙන් Channels 4ක් තියෙනවා. ඒ ත්‍රිමාණ අක්ෂ 3 පාලනය කරන්නත් සහ වේගය පාලනය කරන්නත් වශයෙනුයි.


මේ ප්‍රධාන Channel 4, remote එක මත තියෙන sticks 2 මගිනුයි පාලනය කරන්නේ. sticks මත Channels පිහිටන ආකාරය අනුව TR වර්ග 4 ක් තියෙනවා. රූපසටහනෙන් ඒ ගැන පැහැදිලි වෙයි කියලා හිතනවා. Quad copters සදහා වැඩිපුරම පාවිච්චි වෙන්නේ දෙවෙනි ආකාරයයි. (Stick mode 2)


Channel 1 : Roll
Channel 2 : Pitch
Channel 3 : Throttle
Channel 4 : Yaw


Channel 3 වලට අදාල stick එක භාවිතා වෙන්නේ Quad copter එකේ මෝටර් වල වේගය අඩු වැඩි කරන්නයි. ඒ කියන්නේ ඉහල පහල යන එක පාලනය කරන්න. අනිත් sticks 3, Quad copter එක ඉදිරියට, පසුපසට, දෙපැත්තට ගමන් කරවන්න වගේම හරවන්නත් භාවිතා වෙනවා.


මේ sticks වලට අමතරව TR එකේ Switches හා VR (Variables) , Trimmers කියන උපාංගත් තියෙනවා. VR කියන්නෙත් sticks වග‍ේම channel එකක අගය වෙනස් කරන්න පුළුවන් පොඩි ඇණයක් වගේ කොටසක්. TR එකේ ප්‍රධාන channel 4 ට අමතරව එන 5,6,... චැනල වල අගයයන් පාලනය කරන්න VR භාවිතා වෙනවා.


TR එකක අපිට මීළගට කථා කරන්න තියෙන්නේ switches ගැනයි. මේ switches විවිධ කාර්යය සදහා භාවිතා කරන්න පුළුවන්. එ් ඒ switch එකෙන් වන කාර්යය අපිට program කරන්නත් පුළුවන්.
  • ThotCut : Throttle එක on, off කරන්න පුළුවන්. ඒ කියන්නේ Switch එක off කලාම, throttle stick එක තාවකාලිකව විසන්ධි කරන්න පුළුවන්.
  • DR : Dual rate/ sticks වල සංවේදීතාව වෙනස් කරන්න පාවිච්චි කරන පහසුකමක්. මේ පහසුකමත්, program කරන්න පුළුවන්


Trimmers වලින් කරන්නේ sticks වල values භෞතින වශයෙන් සුසර කිරීමයි. වැඩිපුරම පාවිච්චි වෙන්නේ RC Planes වල. Quad copters වලදී මේ පහසුකමින් වැඩි ප්‍රයොජනයක් නෑ. 


මීට අමතරව සමහර TR වල flight modes කීපයක් එකවර භාවිතා කරන්න පුළුවන්. මේ flight modes තෝරන්නත් වෙනම ස්විචයක් තියෙනවා.


මීට අමතරව Advance transmitters වල තව ගොඩක් අමතර පහසුකම් තියෙනවා. ඒ හැම එකක්ම ම මේ ලිපියෙන් විස්තර කරන්න අමාරුයි. හැබැයි TR එකේ instruction manual එක කියවලා ඒ පහසුකම් ගැන දැනගන්න පුළුවන්.


උදා :- FlySky FS CT6B User manual


An Advance Transmiter

අපි දැන් බලමු TR එකක් program කරන්නේ කොහොමද කියලා. මුලින්ම TR සමග ලැබෙන CD එකෙන් TR එකට අදාල drivers සහ programming software එක install කරගන්න. CD එකක් ලැබිලා නැත්නම්, Transmitter එකේ brand name එක google කරලා software එක download කරගන්න වෙයි.


දැන් TR එකට බැටරි සම්බන්ධ කරලා, power on කරගන්න. මීළගට TR එකත් සමග එන USB කනෙක්ටරය පරිගණකයට සම්බන්ධ කරලා, කලින් install කරගත්ත software එක විවෘත කරගන්න. USB converter එකේ අනිත් කෙලවරේ තියෙන PS-2 plug එක, Transmitter එකේ පිටුපස තියෙන PS-2 port එකට සම්බන්ධ කරන්න.


මම මේ සදහා පාවිච්චි කලේ FlySky FS CT6B Transmitter එකයි. දැන් අතුරුමුහුණත‍ේ Settings වලින් අදාල USB port එක select කරලා දෙන්න. (Port එකේ අංකය හොයාගන්න බැරි නම්, Device manager වලින් බලාගන්න පුළුවන්.)


දැන් GetUser කියන බොත්තම ඔබලා, TR එකේ දැනට තියෙන Settings ටික software එකට load කරගන්න.


මේ පියවර සියල්ල නිවැරදිව කළා නම් දැන් TR එකේ sticks එහා මෙහා කරද්දී, අතුරුමුහුණතින් ඒ ඒ චැනල් වල අගයයන් පෙන්වාවි.

  • End point : sticks වල උපරිම හා අවම අගයයන් සැකසීම
  • Reverse : sticks වල දිශා මාරු කිරීම. invert
  • SubTrim : මේක පාවිච්චි වෙන්නේ sticks වල සුසර කිරීම් (Tuning) වලටයි.
  • Sticks : Transmitter එකේ stick modes සකස් කිරීම.
  • Switch A & B : switches වල ක්‍රියාකාරීත්වයන් සැකසීම.
  • VR A & B : Variables (මගේ Transmitte එකේ නම් 5 වන හා 6 වන channels) සැකසීම.


මීට අමතරව තව ගොඩක් පහසුකම් තියෙනවා. ඒ හැම එකක් ගැනම දැනගන්න තියෙන හොදම ක්‍රමය තමයි try & error කියන්නේ. එහෙනම් ඔයාලත් try කරලම බලන්න.


(මේ හදන settings, පරිගණකයේ save කරන්නයි, නැවත load කරන්නයි පුළුවන්. ඒ සදහා system options වල තියෙන save, load button 2 පාවිච්චි කරන්න.)


තවත් දෙයක් කියන්න තියෙනවා. CC3D FC එක භාවිතා කරන අයට, මේ Transmitter එක program කරන්න ඕනම වෙන්නේ නෑ. මොකද, FC එකේ programming software එක, LibraPilot GCS හරහා Transmitter Setup Wizard මගින් Transmitter එකෙන් එන input වෙන වෙනම configure කරගන්න පුළුවන්.


මීළඟ ලිපියෙන් හමුවෙමු.


අළුත් ලිපි පලවූ සැනින් දැනගන්න


Arduino Wearables

by Tony Olsson


Arduino Lily Pad වගේ Wearable ගැන තමයි මේ පොත‍ේ කියවෙන්නේ. Wearable කියන එකෙන් අදහස් වෙන්නේ ඇදුම් පැලදුම් කියන එකයි. කොහොමද ඇදුම් පැලදුම් වලට Arduino සම්බන්ද වෙන්නේ ? 

(විලාසිතා ගැන උනන්දු කාන්තා පාර්ශවයට මේ ප‍ොත ගොඩක් වැදගත් වෙයි. :-) :-) :-) )


පටුන


  • Acknowledgments
  • Preface
  • Chapter 1: Introduction
  • Chapter 2: Software
  • Chapter 3: Hardware
  • Chapter 4: Smart Materials and Tools
  • Chapter 5: LED Bracelets
  • Chapter 6: Solar-Powered Glow-in-the-Dark Bag
  • Chapter 7: Piano Tie
  • Chapter 8: Bag Alarm
  • Chapter 9: Beatbox Hoodie
  • Chapter 10: Sunshine Umbrella
  • Chapter 11: Beat Dress
  • Chapter 12: Shape Memory Flower
  • Chapter 13: EL Wire Dress
  • Chapter 14: Making Things Tiny


Download


Robotics සිංහලෙන්


  • මොකක්ද Robotics කියන්නේ ?
  • කොහොමද සරළ රොබෝ කෙනෙක් නිර්මාණය කරන්නේ ?
  • Motor drive එකක් නිර්මාණය කිරීම
  • IR Sensor panel එකක් නිර්මාණය කිරීම
  • Bluetooth car එකක් නිර්මාණය
  • Line Following රොබ‍ෝ කෙනෙක්  නිර්මාණය කිරීම
  • Pick & Place Arm නිර්මාණය
  • ....................


Arduino Robotics ගැන මුල සිට සරළව කියාදෙන ලිපි පෙළක් ලගදීම බලාපොරොත්තු වන්න.


Raspberry Pi සිංහලෙන්


  • මොකක්ද මේ Raspberry Pi කියන්නේ ?
  • Raspberry Pi වලින් මොනාද කරන්න පුළුවන් ?
  • Raspberry Pi පරිගණකයක් නිර්මාණය කරගැනීම
  • ........


Raspberry Pi ගැන මුල සිට සරළව කියාදෙන ලිපි පෙළක් ලගදීම බලාපොරොත්තු වන්න.


Quadcopters එකලස් කිරීම - II


අද ලිපියෙන් මම බලාපොරොත්තු වෙන්නේ Quad copter එකේ Flight Controller එක නිවැරදිව සම්බන්ධ කරගන්න ආකාරය විස්තර කරන්නයි.

මේ තියෙන්නේ මම පාවිච්චි කරපු CC3D Flight Controller එක ඉහලින් හා පහලින් පෙනෙන ආකාරය.


Board එකේ යට පැත්තෙන් තියෙන micro USB port එක මගින් තමයි FC එක පරිගණකයට සම්බන්ධ කරන්නේ. (පරිගණකයට සම්බන්ධ කරලා Quad copter එක setup කරගන්න ආකාරය ඉදිරි ලිපියකින් කියාදෙන්නම්.)

Board එකත් එක්ක USB cable එක ලැබුණ‍ේ නැත්නම්, ඉලෙක්ට්‍රොනික් බඩු කඩේකින්, micro USB cable එකක් ගන්න වෙනවා. ගන්නකොට 1m හෝ ඊට වැඩි දිග cable එකක් ගන්න පුළුවන් නම් ගොඩක් හොදයි.


Output port

අපි කලින් ලෑස්ති කරගත්ත ESC 4 සම්බන්ධ කරන්න තියෙන්නේ මේ port එකට තමයි. ඊට අමතරව ESC වල BEC පහසුකම තියෙනවා නම්, FC එකට අවශ්‍ය විදුලි බලය ලබාගන්න‍ේත් මේ port එක හරහායි.


Receiver port

Transmiter එකත් එක්ක තියෙන Receiver එක සම්බන්ධ වෙන්නේ මේ port එක හරහායි.


Main port/ Flexi port

Quad copter එකට GPS, Telemetry වගේ වෙනත් උපාංග සම්බන්ධ කරන්න තමයි මේ ports 2 භාවිතා වෙන්නේ.


මේ වෙද්දී මොටර් 4යි ESC එකයි, Power Distribution Board එකයි Frame එකට සම්බන්ධ කරගෙන තියෙන්න ඕන. ඒවා සම්බන්ධ කරන ආකාරය, Frame එකෙන් එකට වෙනස් නිසා ඔයාලා ලග තියෙන frame එකට අදාල ක්‍රමය, YouTube වීඩියෝවක් බලලා හොයාගන්න වෙනවා. (මට වෙලාවක් ලැබුණොත්, Alien500 frame එකට වීඩියෝ tutorial එකක් දෙන්න බලන්නම්.)

FC එක Frame එකට සම්බන්ධ කරන දිශාව ග‍ොඩක් වැදගත් වෙනවා. අනිවාර්යයෙන්ම CC3D Board එක, Frame එකට සම්බන්ධ වෙන්න ඕන පහළ රූපයේ තියෙන විදිහටයි. උඩ යට මාරු වුණ‍ොත් හරි, ඉදිරිපස පිටුපස මාරු වුණ‍ොත් හරි Quad copter එක නිවැරදිව ක්‍රියා ‍නොකරන්න ඉඩ තියෙනවා.


ඊළඟ වැදගත්ම කාරණය තමයි FC එක, frame එකට සම්බන්ධ කිරීමේදී රබර් බුෂ් හෝ වෙනත් කම්පන අවශෝෂක උපක්‍රමයක් භාවිතා කරන්න සිදුවෙනවා. ඒ Quad copter එක ගුවන්ගත වීමේදී ඇතිවන දෙදරීම් හා කම්පන වලින් FC එකට සිදුවිය හැකි බලපෑම අවම කරන්නයි.

දැන් ESC වලින් එන 3 pin cables සම්බන්ධ කරන්නයි සූදානම් වෙන්නේ. ඊට කලින්, cable එක පෑනක් හෝ පැන්සලක් වටේ ඔතලා මේ රූපසටහනේ විදිහට හදාගත්තා නම් වැඩේ ගොඩක් පහසු වෙනවා.


දැන් මේ රූපසටහනේ විදිහට, පළවෙනි මෝටරය‍ේ ESC එක, පළවෙනි pin එකට සම්බන්ධ කරගන්න. සම්බන්ධ කිරීමේදී, + - මාරු නොවෙන්න පරිස්සම් වෙන්න. වැරදියට සම්බන්ධ කරලා තිබුණ‍ොත් බ‍ෝර්ඩ් එකට හානි වෙන්න ඉඩතියෙනවා.


මේ විදිහට ESC 4ම FC එකට සම්බන්ධ කරගන්න. දැන් ආයෙත් සැරයක් හොදින් පරීක්ෂා කරලා බලන්න සියල්ල නිවැරදිවද සම්බන්ධ කරලා ද තියෙන්නේ කියලා.


ඊළගට තියෙන්නේ Receiver එක සම්බන්ධ කරගන්නයි. මම පාවිච්චි කළේ Fly sky FS-CT6 B transmitter එකක්. ඒක‍ේ Receiver එක තමයි මේ තියෙන්නේ.


FC එකත් එක්ක වයර් set 3ක් හම්බ වෙනවා. ඒවා අතරින් ලොකුම set එක තමයි මේ සදහා පාවිච්චි කරන්නේ. (අනිත් set 2 තිය‍ෙන්නේ Flexi port, Main port වලට. ඒ නිසා ඒ Set 2 දැන්ම ඕන වෙන්නේ නෑ)


දැන් වයර් set එකේ කනෙක්ටර් එක, FC එකට සම්බන්ධ කරගන්න. අනිත් පැත්තේ වයර් ටික මේ රූප සටහනේ විදිහට Receiver එකට සම්බන්ධ කරගන්න. රතු වයර් එක + වලටත්, කළු වයර් එක - වලටත් සම්බන්ධ කරන්න. (Receiver එකට විදුලිය ලැබෙන්නේ මේ වයර් 2 න් තමයි.) අනිත් වයර් ටික, Receiver එකේ 1 ඉදලා 6 වෙනකම් Channel වල signal කියන pin එකටයි සම්බන්ධ කරන්න ඕන. මේ pin ගැන විස්තරයක් receiver එකේ පොඩිවට Print කරලා ඇති.


රතු, කළු වයර් 2 ඇරුණම අනිත් වයර් වල පාට ගැන හිතන්න ඕන නෑ.ඒවා කනෙක්ටරයේ තියෙන පිළිවෙලට ch1 වල ඉදලා ch6 වෙනකම් පිළිවෙලින් සම්බන්ධ කරගත්තානම් ඇති.


ඉතිරි කොටස මීළඟ ලිපියෙන් කියාදෙන්නම්. 


Learn Electronics with Arduino

by Don Wilcher


ආර්ඩියුනෝ සමගම ඉලෙක්ට්‍රෝනික්ස් ඉගෙනගන්න. Electronics දැනුම වර්ධනය කරගන්න කැමති අයට මේ පොත ගොඩක් ප්‍රයෝජනවත් වෙනවා. Arduino Project අතර Electronics Theories හොදින් විස්තර කරලා තියෙනවා.

කැමති අය Download කරගන්න. පිටු 269 යි.


පටුන

Introduction
Chapter 1: Electronic Singing Bird
Chapter 2: Mini Digital Roulette Games
Chapter 3: An Interactive Light Sequencer Device
Chapter 4: Physical Computing and DC Motor Contro
Chapter 5: Motion Control with an Arduino: Servo and Stepper Motor Controls
Chapter 6: The Music Box
Chapter 7: Fun with Haptics
Chapter 8: LCDs and the Arduino
Chapter 9: A Logic Checker
Chapter 10: Man, It’s Hot: Temperature Measurement and Contro


Download


අළුත් ලිපි පලවූ සැනින් දැනගන්න
 බ්ලොග් එකේ Facebook FAN Page එකට ඔබත් සම්බන්ධ වෙන්න.


Arduino Cookbook, 2nd Edition

Recipes to Begin, Expand, and Enhance Your Projects
By Michael Margolis


Arduino ගැන මුල ඉදලා ඉගෙනගන්න කැමති අයට මේක තමයි හොදම පොත. ආර්ඩියුන‍ෝ ගැන මුල ඉදලා විස්තර කරලා තියෙනවා වගේම ඒ පාඩම් සියල්ල ඉතා පිළ‍ිවෙලට වර්ගීකරණය කරලත් තියෙනවා.

Cookbook කියන නමින් අදහස් වෙන විදිහටම Arduino සම්බන්ධ සියළු Recepies / වට්ටෝරු මේ පොතේ අන්තර්ගතයි. 

කැමති අය download කරගන්න. පිටු 658 ම තියෙනවා.


පටුන


Chapter 1 Getting Started
  • Introduction
  • Installing the Integrated Development Environment (IDE)
  • Setting Up the Arduino Board
  • Using the Integrated Development Environment (IDE) to Prepare an Arduino Sketch
  • Uploading and Running the Blink Sketch
  • Creating and Saving a Sketch
  • Using Arduino
Chapter 2 Making the Sketch Do Your Bidding
  • Introduction
  • Structuring an Arduino Program
  • Using Simple Primitive Types (Variables)
  • Using Floating-Point Numbers
  • Working with Groups of Values
  • Using Arduino String Functionality
  • Using C Character Strings
  • Splitting Comma-Separated Text into Groups
  • Converting a Number to a String
  • Converting a String to a Number
  • Structuring Your Code into Functional Blocks
  • Returning More Than One Value from a Function
  • Taking Actions Based on Conditions
  • Repeating a Sequence of Statements
  • Repeating Statements with a Counter
  • Breaking Out of Loops
  • Taking a Variety of Actions Based on a Single Variable
  • Comparing Character and Numeric Values
  • Comparing Strings
  • Performing Logical Comparisons
  • Performing Bitwise Operations
  • Combining Operations and Assignment
Chapter 3 Using Mathematical Operators
  • Introduction
  • Adding, Subtracting, Multiplying, and Dividing
  • Incrementing and Decrementing Values
  • Finding the Remainder After Dividing Two Values
  • Determining the Absolute Value
  • Constraining a Number to a Range of Values
  • Finding the Minimum or Maximum of Some Values
  • Raising a Number to a Power
  • Taking the Square Root
  • Rounding Floating-Point Numbers Up and Down
  • Using Trigonometric Functions
  • Generating Random Numbers
  • Setting and Reading Bits
  • Shifting Bits
  • Extracting High and Low Bytes in an int or long
  • Forming an int or long from High and Low Bytes
Chapter 4 Serial Communications
  • Introduction
  • Sending Debug Information from Arduino to Your Computer
  • Sending Formatted Text and Numeric Data from Arduino
  • Receiving Serial Data in Arduino
  • Sending Multiple Text Fields from Arduino in a Single Message
  • Receiving Multiple Text Fields in a Single Message in Arduino
  • Sending Binary Data from Arduino
  • Receiving Binary Data from Arduino on a Computer
  • Sending Binary Values from Processing to Arduino
  • Sending the Value of Multiple Arduino Pins
  • How to Move the Mouse Cursor on a PC or Mac
  • Controlling Google Earth Using Arduino
  • Logging Arduino Data to a File on Your Computer
  • Sending Data to Two Serial Devices at the Same Time
  • Receiving Serial Data from Two Devices at the Same Time
  • Setting Up Processing on Your Computer to Send and Receive Serial Data
Chapter 5 Simple Digital and Analog Input
  • Introduction
  • Using a Switch
  • Using a Switch Without External Resistors
  • Reliably Detecting the Closing of a Switch
  • Determining How Long a Switch Is Pressed
  • Reading a Keypad
  • Reading Analog Values
  • Changing the Range of Values
  • Reading More Than Six Analog Inputs
  • Displaying Voltages Up to 5V
  • Responding to Changes in Voltage
  • Measuring Voltages More Than 5V (Voltage Dividers)
Chapter 6 Getting Input from Sensors
  • Introduction
  • Detecting Movement
  • Detecting Light
  • Detecting Motion (Integrating Passive Infrared Detectors)
  • Measuring Distance
  • Measuring Distance Accurately
  • Detecting Vibration
  • Detecting Sound
  • Measuring Temperature
  • Reading RFID Tags
  • Tracking Rotary Movement
  • Tracking the Movement of More Than One Rotary Encoder
  • Tracking Rotary Movement in a Busy Sketch
  • Using a Mouse
  • Getting Location from a GPS
  • Detecting Rotation Using a Gyroscope
  • Detecting Direction
  • Getting Input from a Game Control Pad (PlayStation)
  • Reading Acceleration
Chapter 7 Visual Output
  • Introduction
  • Connecting and Using LEDs
  • Adjusting the Brightness of an LED
  • Driving High-Power LEDs
  • Adjusting the Color of an LED
  • Sequencing Multiple LEDs: Creating a Bar Graph
  • Sequencing Multiple LEDs: Making a Chase Sequence (Knight Rider)
  • Controlling an LED Matrix Using Multiplexing
  • Displaying Images on an LED Matrix
  • Controlling a Matrix of LEDs: Charlieplexing
  • Driving a 7-Segment LED Display
  • Driving Multidigit, 7-Segment LED Displays: Multiplexing
  • Driving Multidigit, 7-Segment LED Displays Using MAX7221 Shift Registers
  • Controlling an Array of LEDs by Using MAX72xx Shift Registers
  • Increasing the Number of Analog Outputs Using PWM Extender Chips (TLC5940)
  • Using an Analog Panel Meter as a Display
Chapter 8 Physical Output
  • Introduction
  • Controlling the Position of a Servo
  • Controlling One or Two Servos with a Potentiometer or Sensor
  • Controlling the Speed of Continuous Rotation Servos
  • Controlling Servos Using Computer Commands
  • Driving a Brushless Motor (Using a Hobby Speed Controller)
  • Controlling Solenoids and Relays
  • Making an Object Vibrate
  • Driving a Brushed Motor Using a Transistor
  • Controlling the Direction of a Brushed Motor with an H-Bridge
  • Controlling the Direction and Speed of a Brushed Motor with an H-Bridge
  • Using Sensors to Control the Direction and Speed of Brushed Motors (L293 H-Bridge)
  • Driving a Bipolar Stepper Motor
  • Driving a Bipolar Stepper Motor (Using the EasyDriver Board)
  • Driving a Unipolar Stepper Motor (ULN2003A)
Chapter 9 Audio Output
  • Introduction
  • Playing Tones
  • Playing a Simple Melody
  • Generating More Than One Simultaneous Tone
  • Generating Audio Tones and Fading an LED
  • Playing a WAV File
  • Controlling MIDI
  • Making an Audio Synthesizer
Chapter 10 Remotely Controlling External Devices
  • Introduction
  • Responding to an Infrared Remote Control
  • Decoding Infrared Remote Control Signals
  • Imitating Remote Control Signals
  • Controlling a Digital Camera
  • Controlling AC Devices by Hacking a Remote-Controlled Switch
Chapter 11 Using Displays
  • Introduction
  • Connecting and Using a Text LCD Display
  • Formatting Text
  • Turning the Cursor and Display On or Off
  • Scrolling Text
  • Displaying Special Symbols
  • Creating Custom Characters
  • Displaying Symbols Larger Than a Single Character
  • Displaying Pixels Smaller Than a Single Character
  • Connecting and Using a Graphical LCD Display
  • Creating Bitmaps for Use with a Graphical Display
  • Displaying Text on a TV
Chapter 12 Using Time and Dates
  • Introduction
  • Creating Delays
  • Using millis to Determine Duration
  • More Precisely Measuring the Duration of a Pulse
  • Using Arduino as a Clock
  • Creating an Alarm to Periodically Call a Function
  • Using a Real-Time Clock
Chapter 13 Communicating Using I2C and SPI
  • Introduction
  • Controlling an RGB LED Using the BlinkM Module
  • Using the Wii Nunchuck Accelerometer
  • Interfacing to an External Real-Time Clock
  • Adding External EEPROM Memory
  • Reading Temperature with a Digital Thermometer
  • Driving Four 7-Segment LEDs Using Only Two Wires
  • Integrating an I2C Port Expander
  • Driving Multidigit, 7-Segment Displays Using SPI
  • Communicating Between Two or More Arduino Boards
Chapter 14 Wireless Communication
  • Introduction
  • Sending Messages Using Low-Cost Wireless Modules
  • Connecting Arduino to a ZigBee or 802.15.4 Network
  • Sending a Message to a Particular XBee
  • Sending Sensor Data Between XBees
  • Activating an Actuator Connected to an XBee
  • Sending Messages Using Low-Cost Transceivers
  • Communicating with Bluetooth Devices
Chapter 15 Ethernet and Networking
  • Introduction
  • Setting Up the Ethernet Shield
  • Obtaining Your IP Address Automatically
  • Resolving Hostnames to IP Addresses (DNS)
  • Requesting Data from a Web Server
  • Requesting Data from a Web Server Using XML
  • Setting Up an Arduino to Be a Web Server
  • Handling Incoming Web Requests
  • Handling Incoming Requests for Specific Pages
  • Using HTML to Format Web Server Responses
  • Serving Web Pages Using Forms (POST)
  • Serving Web Pages Containing Large Amounts of Data
  • Sending Twitter Messages
  • Sending and Receiving Simple Messages (UDP)
  • Getting the Time from an Internet Time Server
  • Monitoring Pachube Feeds
  • Sending Information to Pachube
Chapter 16 Using, Modifying, and Creating Libraries
  • Introduction
  • Using the Built-in Libraries
  • Installing Third-Party Libraries
  • Modifying a Library
  • Creating Your Own Library
  • Creating a Library That Uses Other Libraries
  • Updating Third-Party Libraries for Arduino 1.0
Chapter 17 Advanced Coding and Memory Handling
  • Introduction
  • Understanding the Arduino Build Process
  • Determining the Amount of Free and Used RAM
  • Storing and Retrieving Numeric Values in Program Memory
  • Storing and Retrieving Strings in Program Memory
  • Using #define and const Instead of Integers
  • Using Conditional Compilations
Chapter 18 Using the Controller Chip Hardware
  • Introduction
  • Storing Data in Permanent EEPROM Memory
  • Using Hardware Interrupts
  • Setting Timer Duration
  • Setting Timer Pulse Width and Duration
  • Creating a Pulse Generator
  • Changing a Timer’s PWM Frequency
  • Counting Pulses
  • Measuring Pulses More Accurately
  • Measuring Analog Values Quickly
  • Reducing Battery Drain
  • Setting Digital Pins Quickly
  • Uploading Sketches Using a Programmer
  • Replacing the Arduino Bootloader
  • Reprogram the Uno to Emulate a Native USB device
  • Appendix Electronic Components
  • Capacitor
  • Diode
  • Integrated Circuit
  • Keypad
  • LED
  • Motor (DC)
  • Optocoupler
  • Photocell (Photoresistor)
  • Piezo
  • Pot (Potentiometer)
  • Relay
  • Resistor
  • Solenoid
  • Speaker
  • Stepper Motor
  • Switch
  • Transistor
Appendix Using Schematic Diagrams and Data Sheets
  • How to Read a Data Sheet
  • Choosing and Using Transistors for Switching
  • Appendix Building and Connecting the Circuit
  • Using a Breadboard
  • Connecting and Using External Power Supplies and Batteries
  • Using Capacitors for Decoupling
  • Using Snubber Diodes with Inductive Loads
  • Working with AC Line Voltages
Appendix Tips on Troubleshooting Software Problems
  • Code That Won’t Compile
  • Code That Compiles but Does Not Work as Expected
  • Appendix Tips on Troubleshooting Hardware Problems
  • Still Stuck?
Appendix Digital and Analog Pins
Appendix ASCII and Extended Character Sets
Appendix Migrating to Arduino 1.0
  • Migrating Print Statements
  • Migrating Wire (I2C) Statements
  • Migrating Ethernet Statements
  • Migrating Libraries
  • New Stream Parsing Functions

Arduino ගැන පොඩි හැදින්වීමක්


"Arduino is an open-source electronics platform based on easy-to-use hardware and software. It's intended for anyone making interactive projects."

                    arduino.cc නිල වෙබ් අඩවියෙන් කියන විදිහට  Arduino  කියන්නේ  දෘඩාංග හා මෘදුකාංග අතර පහසුවෙන් කටයුතු කළහැකි අතුරුමුහුණතක්.


මොකක්ද මේ ආර්ඩියුනෝ කියන්නේ ?

ආර්ඩියුනෝ කට්ටලක් යනු පරිසරයෙන් ආදාන (Inputs) ලබාගැනීමටත්, පරිසරයට ප්‍රතිදාන(Outputs) ලබාදීමටත් පහසුකම් සපයන පරිගණක පද්ධතියක් විදිහට හදුන්වන්න පුළුවන්. එය සරල මයික්‍රෝ කන්ට්‍රෝලර් (Micrcontroller) පරිපථයක් සහ මෘදුකාංග සංවර්ධන අතුරුමුහුණතකින් (Software Development Interface) සමන්විතයි.

ඇයි ආර්ඩියුනෝ මෙතරම් විශේෂ ?

ආර්ඩියුනෝ හැරුණම  තවත් බොහෝ මයික්‍රෝ කන්ට්‍රෝලර් පද්ධති තිබෙනවා. (Parrallax Basic Stamp, Netmedia's BX-24, Phidgets, MIT's Handyboard , ... ) ඒත් මේ සියල්ල සදහාම මයික්‍රෝකන්ට්‍රෝලර් වල දෘඩාංග පිළිබඳ ඉහල දැනුමක් අවශය වෙනවා. නමුත් ආර්ඩියුනෝ සදහා දෘඩාංග පිළිබඳ දැනුමක් අවශ්‍ය වෙන්නේ බොහොම අඩුවෙන්. ඒ වගේම ආර්ඩියුනෝ ප්‍රෝග්‍රෑමින් ඉතා පහසුවෙන් ඉගෙනගන්න පුළුවන්.